Moving or migrating your existing WordPress site to a new host can be done quite quickly with a plugin or if you need to with a manual process. While this task is quite simple there are still domain names, name servers and new and old hosting accounts to navigate. In this article I will show you a complete process to migrate your site.
Table of contents:
- The original site and host
- Finding a new hosting account
- Setting up your site on the new host
- Changing name servers and the domain name
The original site and host
The existing WordPress site is often on wordpress.com or wordpress.org or perhaps a third party host that you have become unhappy with for some reason. In this tutorial we are going to ‘wrap up’ the existing site (files including images and database) and move or migrate it to a new hosting company. Once complete you can discard or end your contract with your old hosting company if you want to.
Domain Names:
A domain name (yoursite.com for eg) is a separate thing to your WordPress site and hosting account. Confusingly it could have been purchased with your current or old hosting account as sometimes this is done. The main thing to remember is that if you want to continue to use the same domain name then make sure to keep it.
If you bought the domain name with the hosting account then you can ‘move’ the management of that domain name to the new host. If you didn’t and you purchased with an external domain name registrar then you can leave it where it is and simply change the ‘name servers’ (I’ll explain that later in this article) to point to the new hosting account you create.
PROTIP: If you are getting a new domain name check out guide to buying an effective and affordable one easily.
Finding a new hosting account
Before migrating you will need to find a home for your existing WordPress site. If you have already got a host account then feel free to skip this section. If not you can search WordPress Hosting plans and find one that is suitable.
TIP: Some hosts provide a free transfer service and you can search by those companies in the above link. If you really want a hands off approach that may just be the way to do it.
Setting up your site on the new host
TIP: You should already have a new hosting company if you are at this part of the process. If not scroll up one section and go from there.
This is a 3 step process of,
- preparing the new host to have your domain name (or a sub-domain) set up
- exporting the appropriate files and database (which represents your WordPress site from a technical point of view). There are two methods with which you can utilize to do this either with a plugin or a manual process. I’ll outline both of them in detail and depending on your situation you can use either.
- The files which were exported in step 2 then need to be ‘installed’ or ‘imported’ on the new host.
2. 1 Preparing the new host with a domain name
There are quite a few options here based on your particular set up. At a high level you are attempting to connect or create a domain to your account without quite changing the name servers over yet. We’ll cover that later in this article.
- When setting up your hosting account you may have set up a domain name with the account and as such you can probably skip to the next step. You also may not have.
- If you didn’t set up a domain name with your account then you need to add one but it doesn’t have to be a high level domain (eg yourseite.com) and instead can be a sub-domain (eg subfolder.yoursite.com). TIP: this is a great option if you don’t want to launch just yet.
- Its also possible that your hosting account can handle multiple domain names and in that case you probably want to find the area to assign or ‘add on’ a new domain.
Whichever of the above you choose create a domain for your site and in the next steps we’ll migrate there soon.
2.2 Exporting and then importing the necessary files (aka entire WordPress site)
2.2.1 Plugin method for exporting a WordPress site (easiest)
You can install this All In One WP Migration Plugin on your existing WordPress site and follow the below instructions.
Step 1:
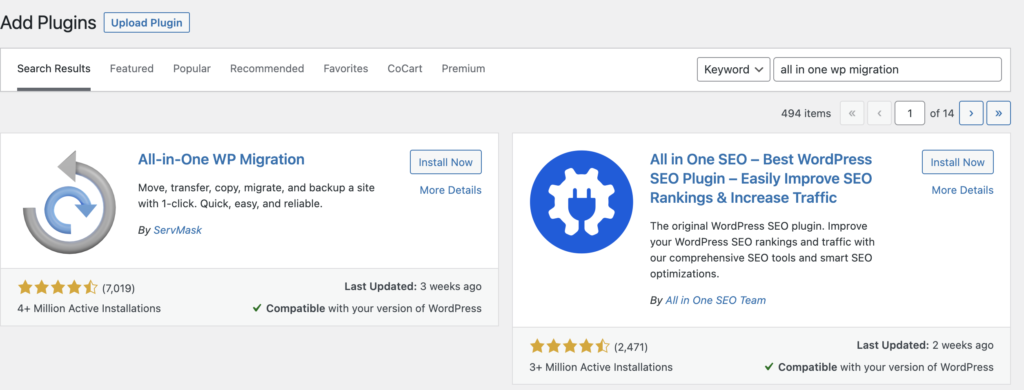
- You can install the All In One WP Migration Plugin by going to your plugin dashboard at something like, https://yoursite.com/wp-admin/plugin-install.php and searching in the search box for ‘All in one WP Migration‘ which will then display the plugin for you to install and activate as per the below screenshot.
- Alternatively, you could also install it manually by downloading it at All in One WP Migration and then uploading the downloaded zip file at your url similar to, https://yoursite.com/wp-admin/plugin-install.php and hitting the ‘upload plugin button’ at top of screen.
- Once installed make sure to ‘activate‘ it before moving onto the next steps.
Step 2:
Now its installed you can go to this a similar URL this on your site, https://yoursite.com/wp-admin/admin.php?page=ai1wm_export, and add some settings to the export of your site.
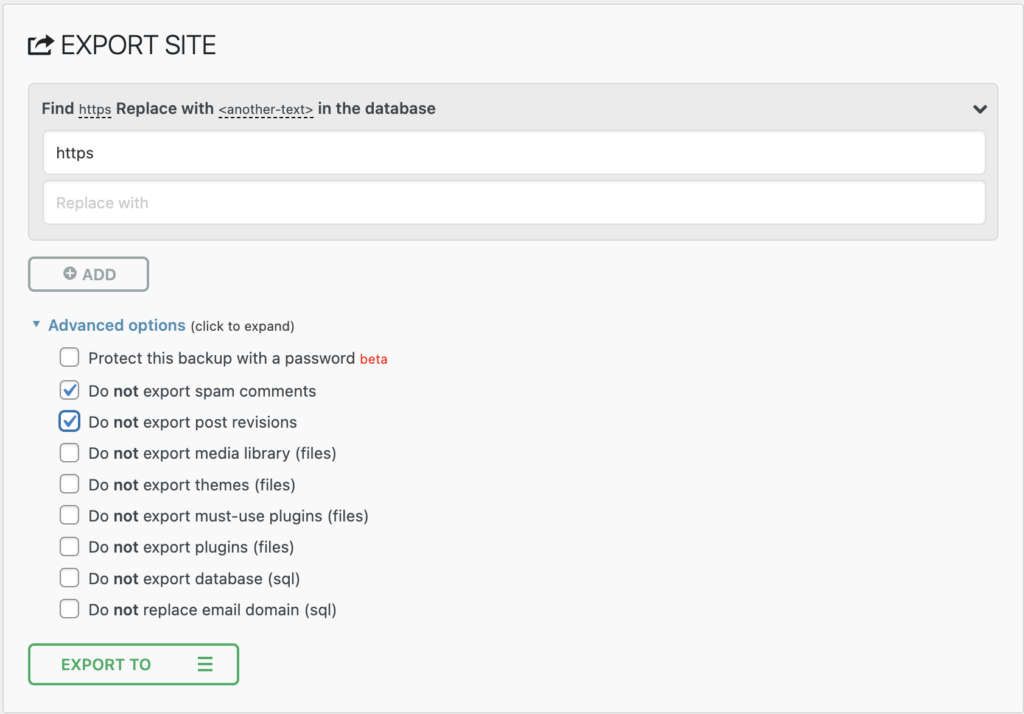
Choose whatever settings you like and then hit ‘Export‘ Button.
NOTE: If you are changing the URL at the same time as moving hosts (unlikely but possible) there is an option here to replace the URL (or any other string) in the database. This is necessary because WordPress hardcodes the URLs into the database. This will break your new installation if you don’t change this. This is assuming you are changing URLs. If your URL will remain the same then this is not necessary.
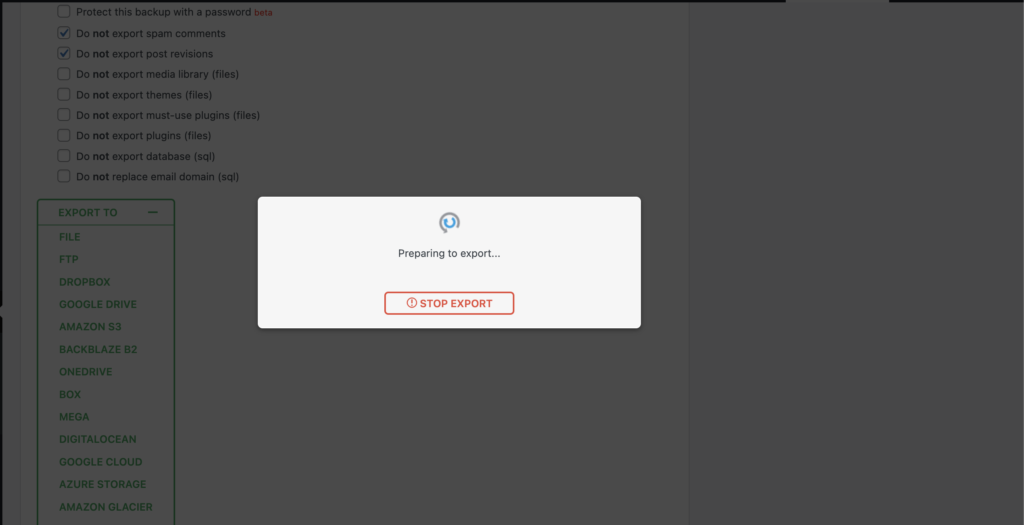
You will have a choice of exporting to different formats. I selected ‘Files‘ and proceeded from there.
You will see an ‘export‘ screen while it performs the export task. This could take a while depending on the settings you chose and the size of your site.
Once complete you will see a download button for your site. Click it and let the compressed .zip file of your site download.
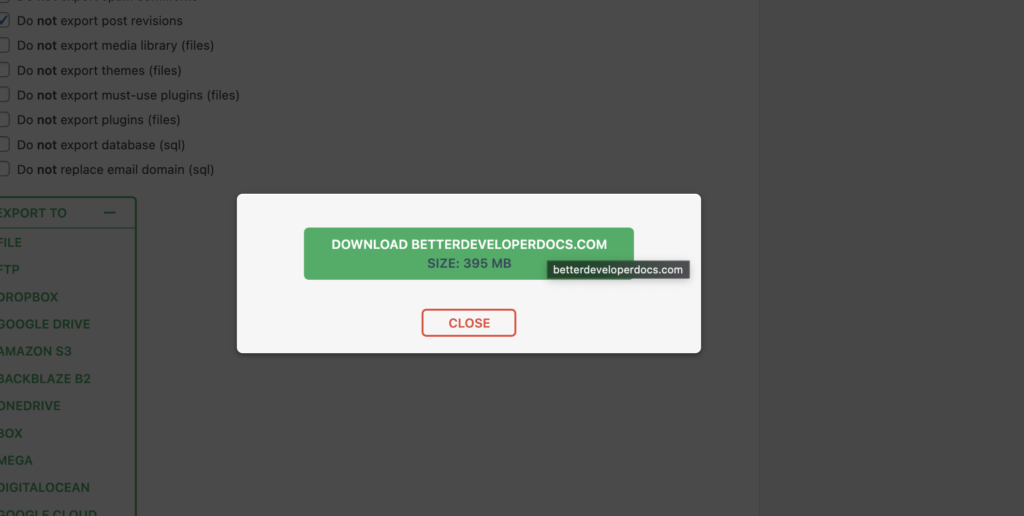
Once the file is downloaded we then need to go on over to your new hosting account.
Step 3:
3.1: Create a new WordPress installation on your new host account:
If there is NOT already a WordPress Installation on your new host then you need to follow this step. If THERE IS then you can skip it and go to section 3.3.
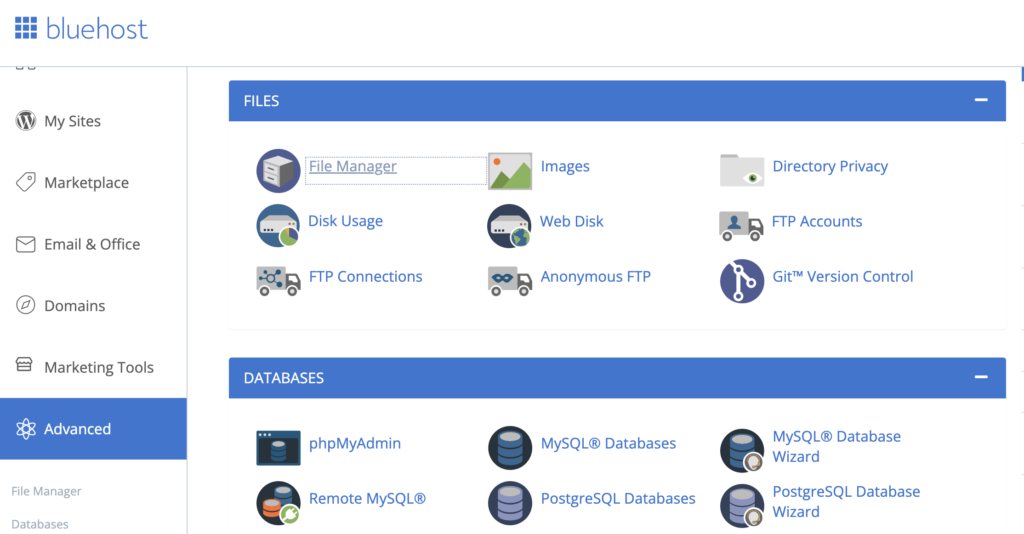
- Inside your hosting dashboard go to your cPanel (you might have to look around for this a bit but most hosts use cPanel.) and find the ‘WordPress Manager with Softaculous‘ Icon.

- Click into Softaculous and create a new WordPress site with ‘Install’ button to create a new WordPress Installation.
- It will take you through the installation process and allow you to login to your new WordPress site.
3.2: Install All in One WP Migration
On this new installation install the All in One WP Migration Plugin. This is the same process as you followed above in the old site. This time follow the same steps as before but on the new site.
3.3 Import your original site which you exported in step 2 above:
In your new installation of the WordPress CMS and on the left hand side go to ‘All in WP Migration’ menu item and then ‘import’.
Upload the file compressed file with which you exported the original site in the previous step. This could take a while depending on the size of your site and the options you selected.
NOTE: This will overwrite the initial installation of WordPress which means you will need to login again.
3.4: Login to your new site and change permalink settings in the new site:
Because you just uploaded a new database you will be asked to login again to this Bluehost version of the original site. Login with your normal details that you would have used for the previous (original) site.
Once logged in, you will also want to go to the left hand side of CMS and ‘Settings’ -> ‘Permalinks’. Click ‘Permalinks’.
Hit ‘Save’ button on this page.
Then hit ‘Save’ button AGAIN on this same page. This will make WordPress execute some internal rules for its permalink structure.
3.5: Review and troubleshoot:
You should now be able to browse the front end and the CMS of your site at its new home on the Bluehost server. Check it out and see if you have any issues. If so, try to re-read the above instructions to be clear. Sometimes it might take a few minutes to start working.
2.2.2 Manual method of exporting and importing a WordPress site
Step 1:
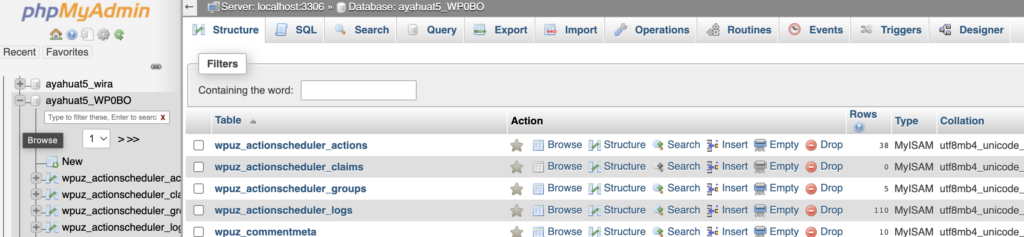
Go to your PHP MyAdmin which is on your host account cPanel. You will need to go to your hosts website and login and access the cPanel to get into PHP MyAdmin.
Step 2:
Find your Database in the list and lick into it.
TIP: If there is more than one database and you aren’t sure which one is the relevant one then you can check this in your https://yoursite.com/wp-config.php file by looking at the value for the DB_NAME variable. You can access this from the ‘File System’ navigator from your cPanel. It can’t be accessed from the WordPress CMS.
After clicking into the database in the horizontal menu near the top of the page you will see an ‘Export’ button. Click it.
Then you will be presented with some options to apply to the exported .sql file we are about to download. You probably only need to select the ‘Include DROP File’ checkbox but even this is optional.
Then click ‘Export’ and wait for your file to download. It will be an SQL file with suffix of .sql
Step 3:
WordPress hardcodes its URL’s in the database meaning that when you move it you MIGHT need to update these.
If the new URL at the new host server of your site is different than the old one then you WILL need to replace these in order for the site to work in the new server.
You can do this in a couple ways,
- Open up the dowloaded .sql file and do a ‘find and replace’ on the old and new URLS. For eg, I use Sublime Editor to find and replace https://originalsite.com to https://newsite.com
- The other option is do do a similar find and replace in SQL on the new server before you load up the site in the new server however I find this approach more simple so I’ll stick with this for this tutorial in the interest of simplicity.
Download the site files:
We have the database but now we need the files which make up your WordPress site. Follow these steps to find, compress and download these files,
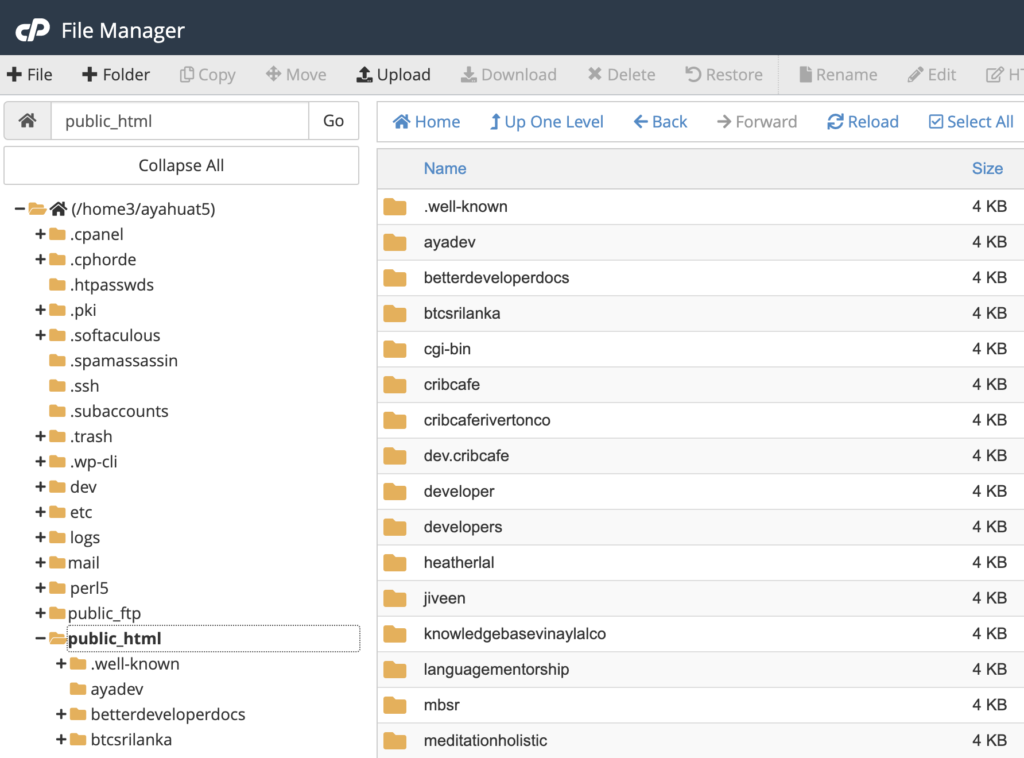
- Go back to your cPanel as you did above.
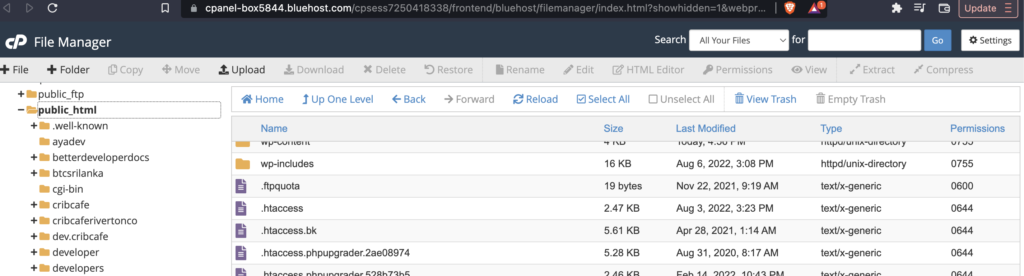
- Find the File System Icon. Click into it.
- Now find the root of your WordPress’s sites files but don’t click into it.
- PROTIP: In the File System viewer you will see a folder named something like, ‘yoursite.com’ or simply ‘yoursite’. If you don’t see these check the ‘public_html’ folder as they may also be in there.
- Now single click on the file.
- Then near the top of the page find the ‘compress‘ button and click it.
- Select ‘.zip‘ as the compression file type and execute.
- In a few moments the page will refresh once the folder has been zipped and you will see a file name something like ‘yoursite.com.zip‘ or ‘public_html.zip‘. This is the compressed version of your entire WordPress files including Core WordPress, Plugins, Themes, anything you’ve uploaded…. everything.
- Double click on the newly created .zip file and it will download to your local computer.
Import to the new site:
At this point you have two downloaded files, the database (.sql) file and the WordPress site files (.zip) file. With these two things we can now go to our new server host and upload the new files to their location over there.
Step 1:
- Now go to the ‘Databases‘ icon on the cPanel. Click into it.
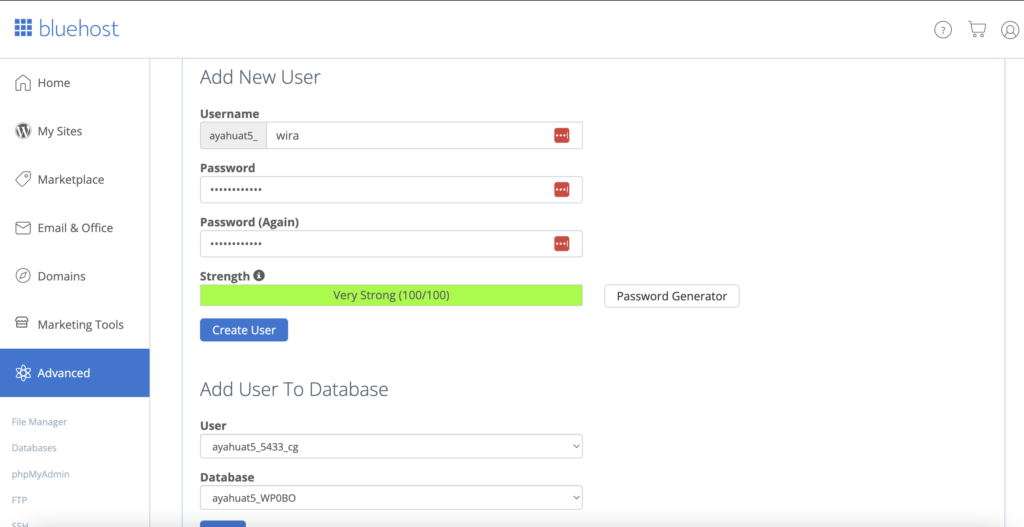
- Create a new database and note down the name of it because in the next steps you will need it.
- You also need to create a new Database User which is on the same page as the one which you created a new database.
- Again, note down the new users username and password as you will need them soon.
Step 2:
- Now go to your ‘File System‘ on your cPanel and find the root folder for your server.
- NOTE: This is not the root folder of you newly assigned website but the root folder of the entire server.
- Find the name of the newly assigned websites folder and note down what it’s called. We are going to do a little folder renaming soon so you’ll need this.
- Single click on this newly assigned folder. Hit the ‘rename’ button above.
- Rename the folder from ‘originalFolderName‘ to originalFolderName.original
- Upload your .zip file which comprises the WordPress site files (which we downloaded in the above steps) to the root of your server also.
- Now decompress this .zip file by single clicking on it and selecting ‘decompress’ from the menu near top of screen.
- Once this is done rename the resulting folder from ‘nameOfUploadedZipFile‘ to ‘oldFolderName‘
- We are basically uploading the WordPress site files, decompressing them and then naming the new folder that of the old so the assigned domain will point to the correct set of files.
Step 3:
- Now go back to cPanel and find the PHP MyAdmin icon. Click into it.
- On the left hand side menu you will see the database with which you created in the above steps. Click on it.
- Find the ‘Import‘ button at the horizontal menu near top of screen.
- There will be a file upload field.
- Click it and upload the .sql file with which you downloaded in a previous step.
Step 4:
- Now go back to your File System viewer and go into the folder of the newly renamed site. In the example above this will be website.com
- Find the wp-config.php file and click the edit button in menu near top of screen.
- You need to replace the value for 3 variables related to the newly created database name, username and password. Hopefully you noted these down as I suggested so you can recall them here.
- Find and replace the code below with your particular values.
Changing name servers or transferring domain name management
One of the final steps is getting your WordPress site live on the new hosting account and getting your existing users to use it as opposed to the previous host’s version. Once this is done you have successfully migrated hosts. There may be some tidy up tasks to tackle but the bulk of the work is done at this point.
Changing name servers:
Go to the account where you bought your domain name. This could be your previous hosting account or a third party domain name registrar.
From here the quickest way is to change the name server info that the domain name points to to that of the new namer servers of the new host. Each hosting company will have their own name servers. Sometime during your sign up process you would have ben given them but if you can’t find them just google ‘x company name servers’ and you should find them. They will look similar to this, ns1.yourhost.com and ns2.yourhost.com.
Transferring the domain name to your new host:
Alternatively but takes longer is to transfer the domain name management to the new hosting company. Go to your original host and figure out how to transfer the domain. If in doubt use the FAQ or contact their customer service. Most of the time changing name servers is perfectly adequate and faster.