You can add a new Admin User either via PHPMyAdmin or in MYSQL and can also create a new user or ‘upgrade’ an existing user to Administrator level. In this article I’ll show you how to do both of these step by step.
Table of Contents
- Admin vs Editors and Other Users in WordPress
- Taking a backup of the database – be careful
- How to add a new Admin User in WordPress using PHP MyAdmin
- How to add a new Admin User in WordPress using MYSQL Queries
- Testing
Admin vs Editors and Other Users in WordPress
Admin and Editor Users have different ‘Roles’ in the CMS and as such can see and do different actions . An Admin User will have more rights than all others although the Super Admin User who set up the site will have yet more rights. Mostly Admin Users are all the same but some small differences can be seen.
WordPress has a number of different ‘Roles’ that can be ascribed to a User depending on your need. When you are creating a new User you will want to know what access rights are possible.
The full list of Users are as follows,
- Super Admin – somebody with access to the site network administration features and all other features.
- Administrator – somebody who has access to all the administration features within a single site.
- Editor – somebody who can publish and manage posts including the posts of other users.
- Author – somebody who can publish and manage their own posts.
- Contributor – somebody who can write and manage their own posts but cannot publish them.
- Subscriber – somebody who can only manage their profile.
Taking a backup of the database – be careful
Creating your own User or editing an existing one in the database directly can be dangerous. If you hit the wrong button in here and aren’t clued into what you are doing you can delete your entire database ie all the sites content.
If you don’t already, or even if you do as some backups are only weekly or daily, have a back up plugin take a copy of the database BEFORE you make any of the below edits so that you can restore it just in case you make some errors you regret.
How to add a new Admin User in WordPress
How to access the WordPress Database on your server (phpMyAdmin)
Step 1: Login to your hosting account (server account)
You will need access to your hosting account and cPanel to access the database. Your WordPress Database is accessible inside of phpMyAdmin which is a GUI for managing your database.
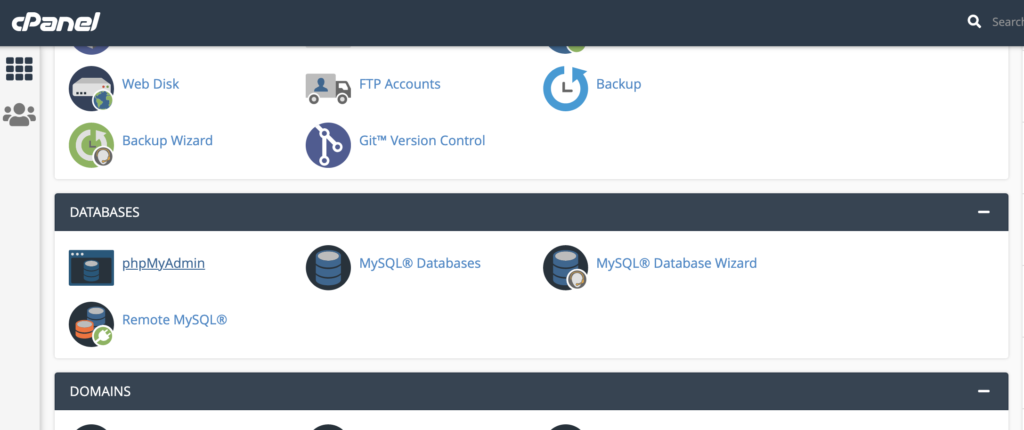
Step 2: Got to your cPanel and find phpMyAdmin
In your hosting account you should be able to find the cPanel which is where all the software and options are to manage your server account with your host. Somewhere on the cPanel there should be a link and Icon to the phpMyAdmin. Find it and click into it.
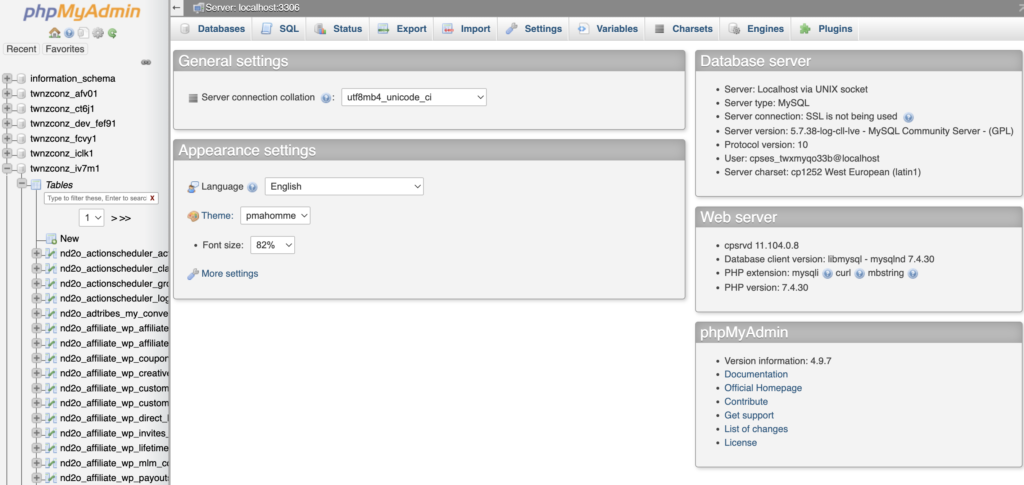
Step 3: Find your Database in PHP MYAdmin
On the left hand side you will see a list of tables for all the sites on hosting account. You may have multiple so you’d need to know exactly which one is connected to your WordPress site.
Get the prefix on the database
- Note that each WordPress installation will have a different ‘prefix’ before each table. When you are navigating the below instructions just note that this tutorial is using the word ‘prefix’ as a placeholder for this.
- For example, xyz_tableName is what you will see when searching the database for tables. Take note of your specific prefix because yours will be different and use it in the below instructions.
- PROTIP: Sometimes it wont be obvious which is your database so you can check in the file system (also available from the cPanel) by navigating to your sites Root and finding the wp-config.php. There will be a variable called DB_NAME which will tell you the name of the database. It will often be some random name like wp_xcf9o.
Click on your database in the left hand menu and proceed to the next step.
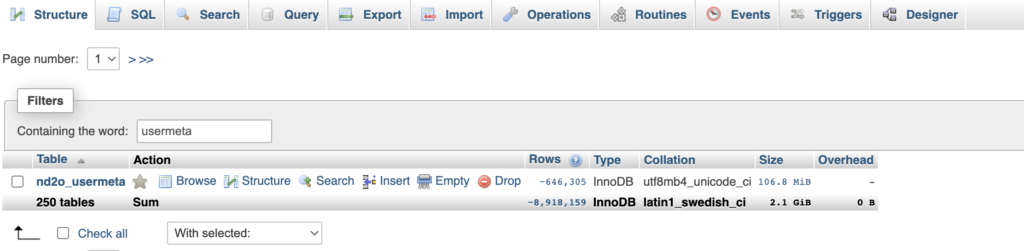
Step 4: Search for ‘wp_usermeta’ table within your database
Once you have clicked into your specific database you can search for your Users Meta table (wp_usermeta) where we will edit the information to change to an Admin User.
You will see something like this when you search. There is a ‘Search Box’ on the top of page under the ‘Filters’ title.
Now you need to click into the user meta table and you will see something like the below with all the meta data for all the Users.

How to change the Role of existing User in the WordPress Database
If there is an existing User in the database who is not an Admin User but you’d like it to be then do the following.
Step 1: Find the specific User Meta in the User Meta Table
To do this you would ideally know the ID of the User. At the top of the page you will see a ‘Search Tab’. Click into it and you will see something like the below.
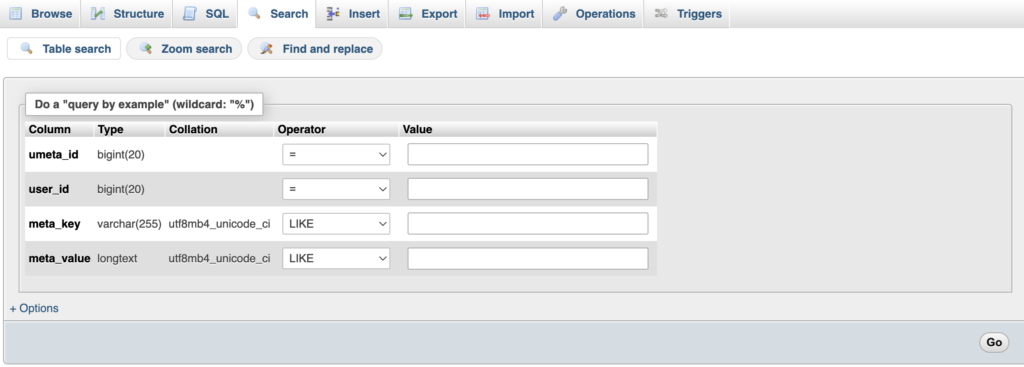
Add the User ID in question to the ‘user_id’ field and hit search. You will then be given some search results. In the next step we’ll edit the one we want.
Step 2: Edit the ‘Capabilities’ User Meta
From the search results you should see something like the below which represents all the User Meta for this particular User.
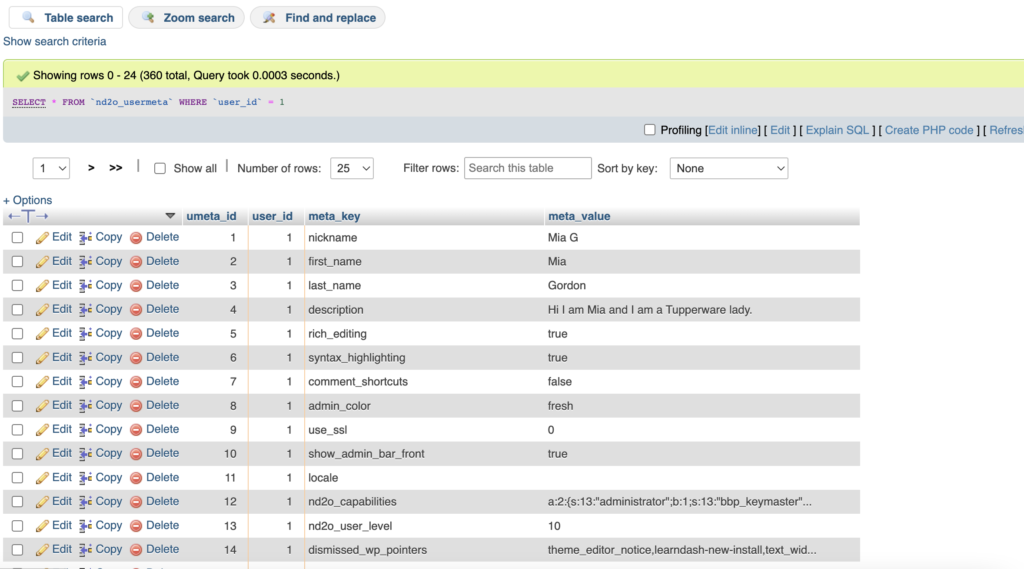
Find the piece of meta which has meta_key of wp-prefix_capabilities. To the left of this piece of meta there will be an ‘Edit’ button for this particular Row. Click on it.
You will then see an edit field similar to the below. You should remove the word ‘Editor’ (or whatever Role is present) and replace it with the word ‘administrator’.
Step 3: Edit the ‘user_level’ Meta:
In the same User Meta table find the meta_key called ‘wp_user_level’ and edit its meta_value to be 10 (as an integer).
How to add a completely new User in the WordPress Database
Step 1:
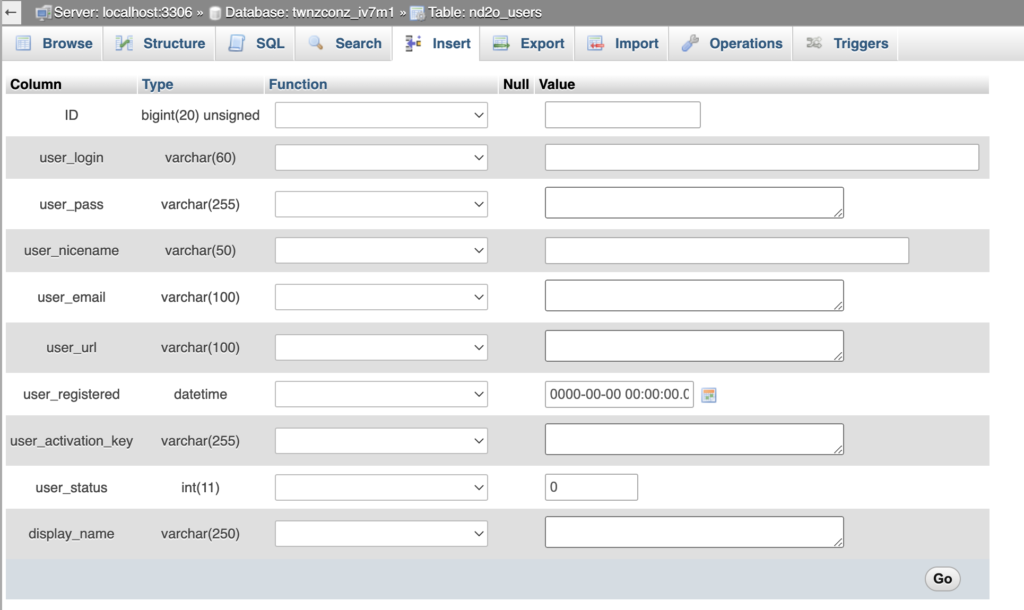
Find the wp_users table and hit the ‘Insert’ button at the top of the Users Table page. You must have clicked into the users table before proceeding. You will see something similar to the below once you have.
Step 2:
You then need to add a bunch of info to the fields. See the list below to know what to add into each.
- ID – This needs to be a number which is not in the database already so make sure you aren’t using an existing ID. Also, remember this number because you will need it in the steps below also.
- user_login – this is the username you would use when logging into the site for eg.
- user_pass – add the password you want this user to have (stronger the better). Make sure to use the MD5 Function in the dropdown otherwise this will not work.
- user_nicename – a nice version of the username to be used around the site.
- user_email – the email address for the user. It can’t be the same as another user.
- user_url – the URL to your site.
- user_registered – enter the current date and time.
- user_status – set this to 0 (zero the integer).
- display_name – this can be the same as the user_nicename above.

Then hit the ‘Go’ button to save these details into the database.
Step 3:
You now need to find the wp_usermeta table and add some info there. Once you find the table in the search box you can click the ‘insert’ button to add a new piece of meta data and you’ll see something like this.
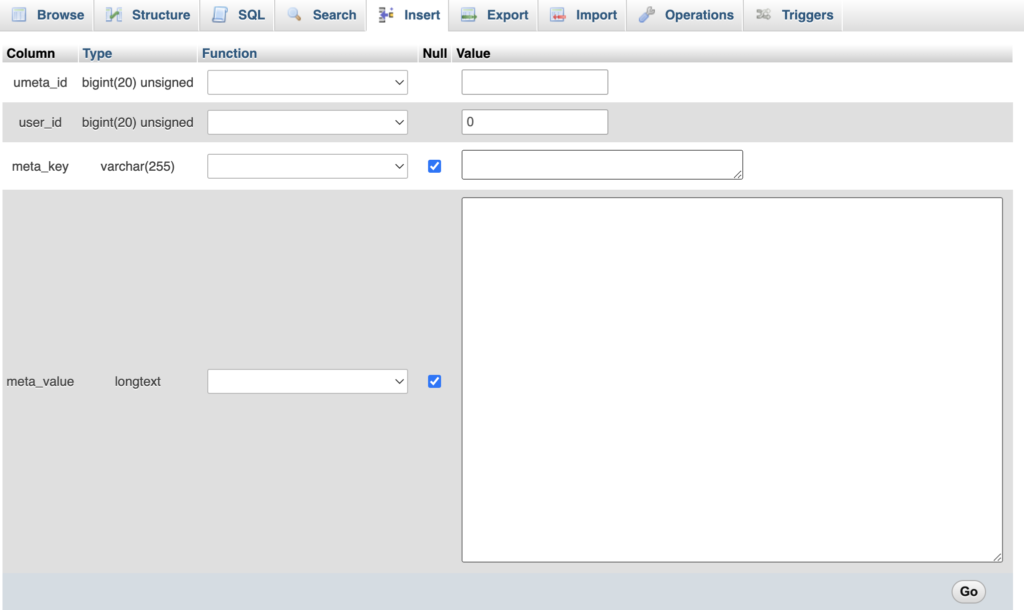
Now you can fill in the fields as per the below:
- unmeta_id – don’t add anything here. it will be autogenerated once you save.
- user_id – add the User Id of the User which you added for ID when creating an entry in the user table above.
- meta_key – this should be wp_capabilities. NOTE: You need to know the prefix for your specific database as WordPress will make this different for each WordPress site.
- meta_value – a:2:{s:13:”administrator”;b:1;s:13:”bbp_keymaster”;b:1;}
Step 4:
You need to add one more meta so hit the ‘Insert’ button one more time and add the a new meta as below.
unmeta_id – don’t add anything here. it will be autogenerated once you save.
user_id – add the User Id of the User which you added for ID when creating an entry in the user table above.
meta_key – this should be wpprefix_user_level. NOTE: You need to know the prefix for your specific database as WordPress will make this different for each WordPress site.
meta_value – 10
How to add a new Admin User in WordPress using MYSQL Queries
Update an Existing User to Admin Using MYSQL
Go to your database, find the wp_usermeta table and find the ‘SQL‘ tab at the top and insert the below code.
NOTE: Make sure you replace the bolded areas for the table names and ID.
UPDATE `wp_usermeta` SET `meta_value` = 'a:2:{s:13:\"administrator\";b:1;s:13:\"bbp_keymaster\";b:1;}' WHERE `wp_usermeta`.`umeta_id` = XX;

UPDATE `wp_usermeta` SET `meta_value` = '10' WHERE `wp_usermeta`.`umeta_id` = XX;
Add a new Admin User Using MYSQL
Go to your database, find the wp_usermeta table and find the ‘SQL‘ tab at the top and insert the below code.
NOTE:
- Make sure you replace the bolded areas for the table names and your own data.
- Make sure to add the MD5 version of your password.
INSERT INTO `wp_users` (`ID`, `user_login`, `user_pass`, `user_nicename`, `user_email`, `user_url`, `user_registered`, `user_activation_key`, `user_status`, `display_name`) VALUES (NULL, 'yourUserLogin', 'md5Password', 'yourNiceName', 'yourEmail', '', 'yourRegisterDate', '', '0', 'yourDisplayName');

INSERT INTO `wp_usermeta` (`umeta_id`, `user_id`, `meta_key`, `meta_value`) VALUES (NULL, 'yourID', 'wp_capabilities', 'a:2:{s:13:\"administrator\";b:1;s:13:\"bbp_keymaster\";b:1;}');

INSERT INTO `wp_usermeta` (`umeta_id`, `user_id`, `meta_key`, `meta_value`) VALUES (NULL, 'yourID', 'wp_user_level', '10');
Testing
To test the above steps you can go to https://yoursite.com/wp-admin/ and you can login with the users username (or email) and password and test the new capabilities.