You can use PHPMyAdmin to import and export WordPress database’s. This is accessible from your cPanel on your hosting dashboard. In this article I will show you how to do this with step by step instructions.
Table of Contents
Exporting a full database
Step 1:
Go to your cPanel on your hosting account. Different Hosting Companies will have different ways of accessing this but all of them have it so you will just need to find where it is in your particular case.
Step 2:
Find the phpMyAdmin link. Click into it.
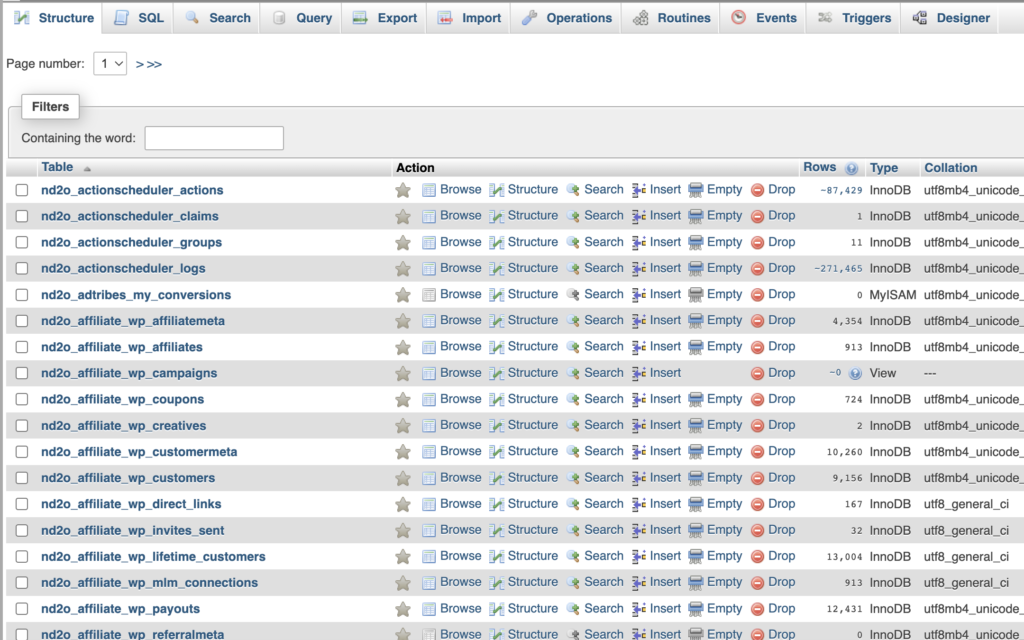
On the left hand side you will see a list of databases. Click into your one.
PROTIP: Sometimes it wont be obvious which is your database so you can check in the file system (also available from the cPanel) by navigating to your sites Root and finding the wp-config.php. There will be a variable called DB_NAME which will tell you the name of the database. It will often be some random name like wp_xcf9o.
After clicking into your specific database on the top of the page you will see an ‘Export’ button.
You will then be presented with the export page.
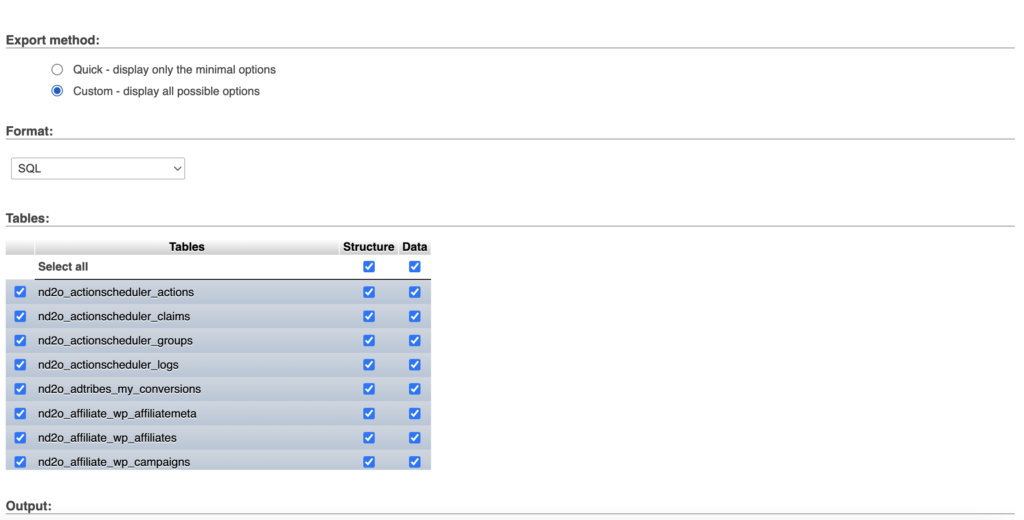
Choose the selections you like and export.
PROTIP: Make sure to select ‘Add DROP TABLE / VIEW / PROCEDURE / FUNCTION / EVENT / TRIGGER statement’ so that if you have to import it you will not get an error.
Wait for the file to download and then you are good to go on with the rest of the process.
Exporting one table of a database
You would follow the same instructions as for exporting a full database except before selecting the ‘Export’ button you must select the specific table you want to replace before exporting the file.
You can use the search bar to search for the specific table and then clicking the import button and selecting your file to upload.
Importing a full database
If you do get into a situation and you want to upload a new database you can import either the full database or update just one of the tables you’d like.
Step 1:
Go to your cPanel on your hosting account. Different Hosting Companies will have different ways of accessing this but all of them have it so you will just need to find where it is in your particular case.
Step 2:
Find the phpMyAdmin link. Click into it.
On the left hand side you will see a list of databases. Click into your one.
PROTIP: Sometimes it wont be obvious which is your database so you can check in the file system (also available from the cPanel) by navigating to your sites Root and finding the wp-config.php. There will be a variable called DB_NAME which will tell you the name of the database. It will often be some random name like wp_xcf9o.
After clicking into your specific database on the top of the page you will see an ‘Import’ button.
You will then be presented with the Import page similar to the below.
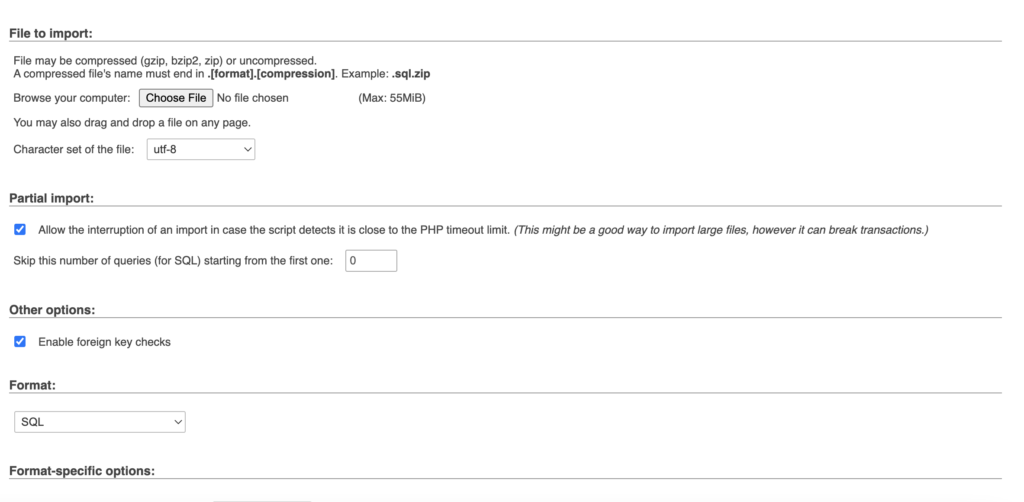
Then you can select the ‘Choose File’ Button and upload the downloaded SQL file.
NOTES:
- Standard is to be able to upload a 55MB file as maximum. This can be altered but normally its enough.
- If, when you exported the file, you didn’t select ‘Add drop table’ option then you may get an upload error. You could avoid this by either adding the drop table option and exporting again or emptying the database and then uploading again but I don’t recommend this option.
Importing one table of a database
You would follow the same instructions as for importing a full database except before selecting the ‘Import’ button you must select the specific table you want to replace before importing the file.
You can use the search bar to search for the specific table and then clicking the import button and selecting your file to upload.