We used the theme ‘Mars’ in the first tutorial just as a default but the rest of this series will take you through the steps to create a custom theme in in Frontity which uses the CoCart API in order to render a WooCommerce store in Frontity.
Table of Contents:
- What is Frontity in WordPress?
- Creating a custom Frontity theme for WooCommerce
- Creating a ROOT Component
- Creating a Link Component
What is Frontity in WordPress?
Frontity is the REACT equivalent of WordPress that allows you to convert WordPress to REACT with a headless CMS configuration. A headless CMS is a method of separating the backend code from the front end code which comprises a traditional website. Doing this has certain advantages in speed, security and user experience which we will discuss below but also has great ability with Search Engine Optimization (SEO) just like a traditional website.
Because of these advantages Frontity can be a very useful way to create a WooCommerce (e-commerce in WordPress) website with large amounts of products with no speed issues, great product SEO, and that has a great user experience on mobile devices and larger tablet and desktop devices. There are various ways to make a headless WooCommerce site but if you can code then Frontity is preferable.
Creating a custom Frontity theme for WooCommerce
There are a few different ways to create a front end app with WordPress as a base. I like Frontity the best because it allows me to code a solution but I have coding skills so if you don’t read the above link in order to see some other options.
1.1 Create new theme in command line
In your command line for your project navigate to your project root which was something like /Users/yourusername/Documents/sites/hello-frontity and run the below command to create a new theme with which we will build upon to create a basic WooCommerce them using Co Cart API to fetch the data and Frontity App to render it to our users.
npx frontity create-package my-first-theme1.2 Select default namespace
After running the above command you will be prompted to select the default namespace. You can just press enter. Once this is done you will have a new directory for your new theme at …/hello-frontity/packages/my-first-theme/.
1.3 Edit settings.js
Now we need to edit some of the code in …/hello-frontity/packages/my-first-theme/frontity.settings.js
Find and remove the below code.
{
  name: "@frontity/mars-theme",
  state: {
    theme: {
      menu: [
        ["Home", "/"],
        ["Nature", "/category/nature/"],
        ["Travel", "/category/travel/"],
        ["Japan", "/tag/japan/"],
        ["About Us", "/about-us/"]
      ],
      featured: {
        showOnList: false,
        showOnPost: false
      }
    }
  }
},
Once the above is removed you can replace it with the below. This code will remove the old set up for the default Mars Theme and allow us to display our new custom theme being ‘my-first-theme’.
{
  name: "my-first-theme"
},
1.4 Render our new theme
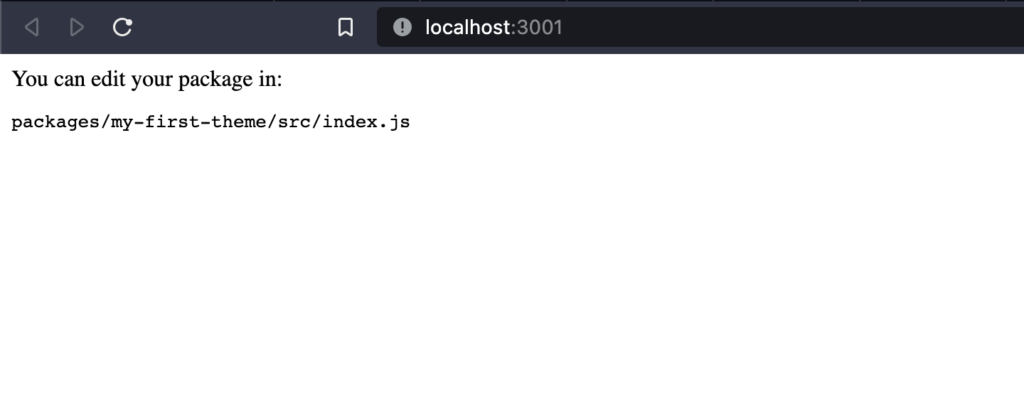
You can now go ahead and start your Frontity project which will compile it and open in your default browser by executing the below code in your command line.
npx frontity devOnce done you should see this in your own browser.
PROTIP: How to follow along with Code changes?
- During this tutorial you can check up on the code changes made in each post by looking for this section on each blog post. Here we will link to the commit history for each set of changes so you can follow along.
- For example, you can view the GIT record for the changes above in order to see exactly which changes we are making in the repository itself.
2.0 Creating a ROOT Component
So, we have the basics of a theme but we need to add more to it so it starts to look like a real theme. We can start by printing out some HTML to the screen.
2.1 Create a new file to house our components
REACT and Frontity (which is based on REACT) project structure is all about components which are reusable sets of JS objects (represented in JSX syntax) so with that in mind let’s create a new folder and file at, …/hello-frontity/my-first-theme/src/components/index.js to house our components going forward.
From there we will add our ROOT component and in a latter step we will import it to render it to screen
// File: /packages/my-first-theme/src/components/index.js

import React from "react"

const Root = () => {
  return (
    <>
      <h1>Hello Frontity</h1>
    </>
  )
}

export default Root
2.2 Update our main index.js file
Now we need to ask our project index.js (you’ll find REACT and Frontity have a lot of these) to get out newly created component from our components file. We can do that by replacing the code in your …/hello-frontity/packages/my-first-theme/src/index.js file.
This file will import our newly created /hello-frontity/my-first-theme/src/components/index.js and hence is where the HTML (JSX really which looks a lot like HTML)
// File: /packages/my-first-theme/src/index.js

import Root from "./components"

const myFirstTheme = {
  name: "my-first-theme",
  roots: {
    theme: Root,
  },
  state: {
    theme: {},
  },
  actions: {
    theme: {},
  },
}

export default myFirstTheme
After this your project should look something like this…

2.3 Code changes for next commit
IMPORTANT EDIT: I accidentally added some extra code to the below commit so just note you only need to add the changes in /packages/my-first-theme/src/index.js and /packages/my-first-theme/src/components/index.js
You can follow the GIT commits since section 1.4.
3.0 Creating a Link Component
Let’s create a link component now which can be used in several places around out site. At this point we’ll create a simple navigation menu but later we will use the same component to render WooCommerce Products to the page. Let’s get started.
As it happens Frontity gives us some of its own built in components including the Link component. To use it we first need to import this component from Frontity’s library.
You can add the below code to top of your /hello-frontity/my-first-theme/src/components/index.js after the existing imports.
import React from "react" // already exists
import Link from "@frontity/components/link" // add this line after the above line
Now we are going to add some JSX (the syntax which looks like HTML) to our Root Component to represent our Menu Links using our Frontity Link Component. This component simply renders to screen a simple <a> tag with its associated attributes when rendered to a page.
Start by finding the below code and removing it…
return (
    <>
      <h1>Hello Frontity</h1>
    </>
  )
You will then want to replace the above code with the following…
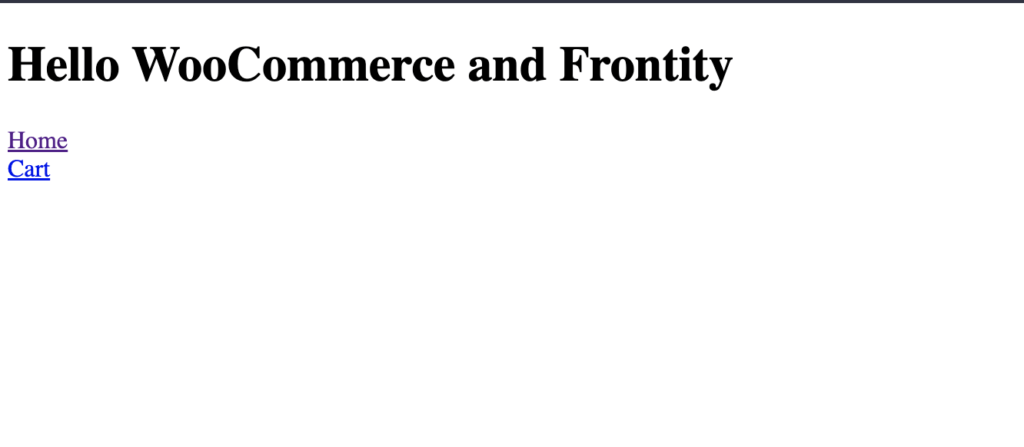
return (
    <>
      <h1>Hello WooCommerce and Frontity</h1>
      <nav>
        <Link link="/">Home</Link>
        <br />
        <Link link="/cart">Cart</Link>
      </nav>
    </>
  )
At this point if you have added the above changes you should see our menu being printed to screen. You should see something like the below.
PROTIP: Part 3 of this tutorial is yet to be written but from here you have the basics to get up and running with all the technology. If you are stuck at this point it might be because you are not yet familiar with the syntax of Frontity which is basically the same as REACT. If so, start to learn how to code REACT projects and you will start to understand the syntax and can progress with Frontity and WooCommerce.