Often you can install WordPress directly on the server without any manual download but it’s also possible to download the original source file and install it manually as a piece of software. If the former then the server dashboard, via Softaculous, will take you through all of the installation process very quickly and you can login within minutes. If the former then its slightly more involved but perfectly possible.
Table of Contents:
- Downloading and Installing live on your server (easier)
- Downloading and Installing manually on local or live server (harder)
Downloading and Installing live on your server (easier)
Login to your cPanel on your server’s host account.
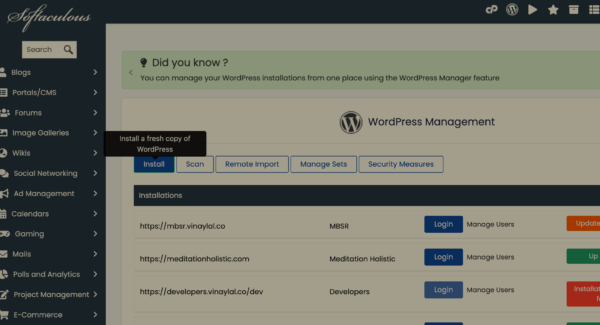
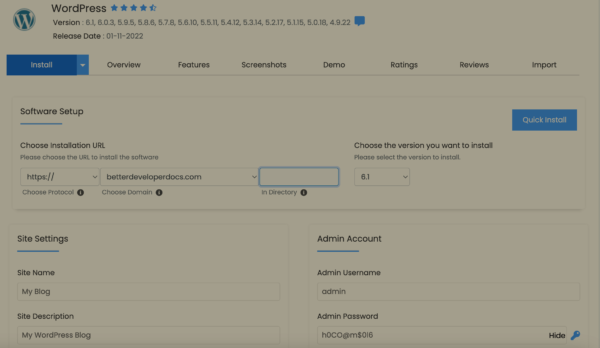
Find the ‘Softaculous’ Plugin on the cPanel.
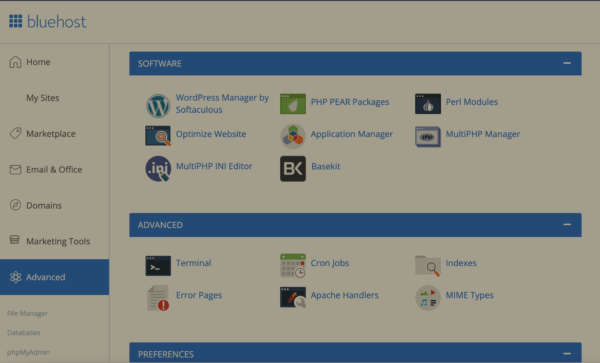
Hit the ‘Install’ button to create a new WordPress Installation.
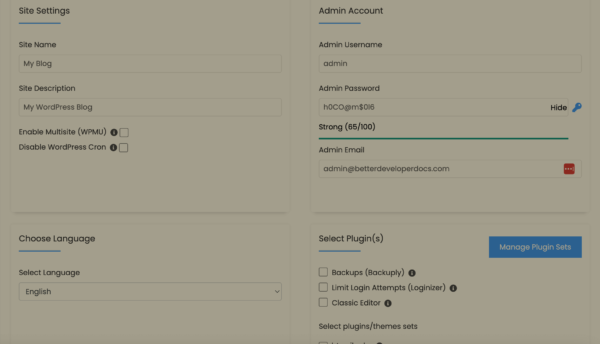
Follow and fill in the various options. You can install plugins on top of the WordPress Software, you can select the Domain Name to install it at (you have to assign the domain first if you haven’t already) and set up all of the passwords etc.
Once complete you will have the opportunity to login to the site and start to manage you WordPress CMS with respect to adding content, altering the aesthetic via themes etc. At this point you are done. Simples.
Downloading and Installing manually on local or live server (harder)
Download the WordPress software. Always use the latest version unless you have a very specific and good reason not to.
Note the recommended software to run WordPress on. For eg at the time of writing this article they are, “Recommend PHP 7.4 or greater and MySQL 5.7 or MariaDB version 10.3 or greater.“
The full instructions can be found here but the short version is (from the wordpres.org site),
Here’s the quick version of the instructions for those who are already comfortable with performing such installations. More detailed instructions follow.
- Download and unzip the WordPress package if you haven’t already.
- Create a database for WordPress on your web server, as well as a MySQL (or MariaDB) user who has all privileges for accessing and modifying it.
- (Optional) Find and rename wp-config-sample.php to wp-config.php, then edit the file (see Editing wp-config.php) and add your database information.
Note: If you are not comfortable with renaming files, step 3 is optional and you can skip it as the install program will create the wp-config.php file for you.- Upload the WordPress files to the desired location on your web server:
- If you want to integrate WordPress into the root of your domain (e.g. http://example.com/), move or upload all contents of the unzipped WordPress directory (excluding the WordPress directory itself) into the root directory of your web server.
- If you want to have your WordPress installation in its own subdirectory on your website (e.g. http://example.com/blog/), create the blog directory on your server and upload the contents of the unzipped WordPress package to the directory via FTP.
- Note: If your FTP client has an option to convert file names to lower case, make sure it’s disabled.
- Run the WordPress installation script by accessing the URL in a web browser. This should be the URL where you uploaded the WordPress files.
- If you installed WordPress in the root directory, you should visit: http://example.com/
- If you installed WordPress in its own subdirectory called blog, for example, you should visit: http://example.com/blog/
That’s it! WordPress should now be installed.
wordpress.org
The longer version can be found here.
Where possible try to follow the Installation Guide from the software organization itself.